Search

modified scull code for 3.x.x

The scull code is the examples that the book, linux device drivers by Jonathan Corbet uses to explain the various concepts of character devices.

Here is the same code modified for 3.x.x kernel versions. The code has been tested in kernel version 3.7.5

main.c
access.c
pipe.c

Change the following line in scull.h


pipe.c of ldd3 modified for 3.x.x kernel version

Here is the pipe.c code of scull, which is a part of Linux Device Drivers by Jonathan Corbet, modified for the kernel version 3.x.x. The code has been tested on 3.7.5

access.c of ldd3 modified for 3.x.x kernel version

Here is the access.c code of scull, which is a part of Linux Device Drivers by Jonathan Corbet, modified for the kernel version 3.x.x. The code has been tested on 3.7.5

main.c of ldd3 modified for 3.x.x kernel version

Here is the main.c code of scull, which is a part of Linux Device Drivers by Jonathan Corbet, modified for the kernel version 3.x.x. The code has been tested on 3.7.5

Creating fire animation using gimp in linux

Here are the steps to create an animation, using gimp, as if an image is on fire as shown below.


To be able to create the animation we will need gimp along with the additional gimp packages, i.e. gimp animation packages gimp-gap and gimp-plugin-registry . To install these extra packages in debian based systems run the command


Note: In the post we will add the fire effect to the image of a logo the same can be done to any other image.

Once the installation is successful, launch gimp and go to


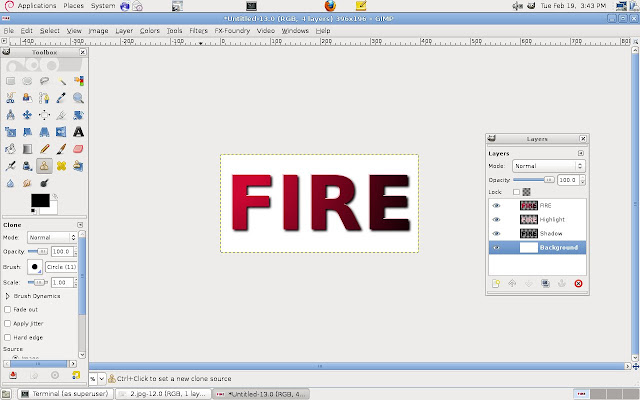
Type the text for which the fire animation has to be added, we have used the text Fire. Choose any color of your preference.


We should see a window as below.


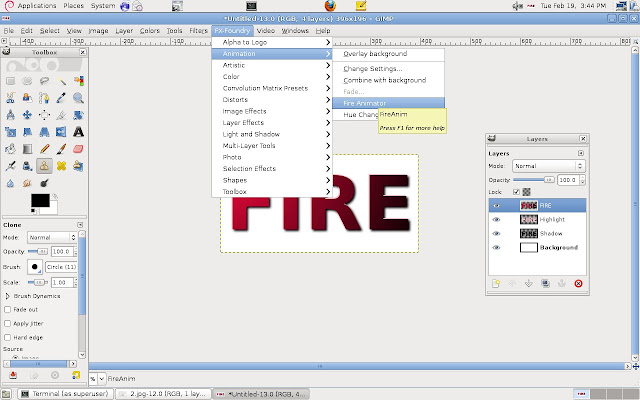
Now click on one of layers to which the animation has to be added and go to


In the menu that is shown we can choose


How many frames of fire animation has to be added, more the number of frames more detailed the fire will look

Overlap flames: How many frames of fire flames will overlap with each other.

Gradient: The color of the flames

Framerate: How fast should the flames appear, smaller the number faster the flames will appear

Angle: The angle of the flames

Distance: How high should the flames be, bigger the number higher the flames, hence the fire appears bigger.

Background: The image on which the flames should appear.

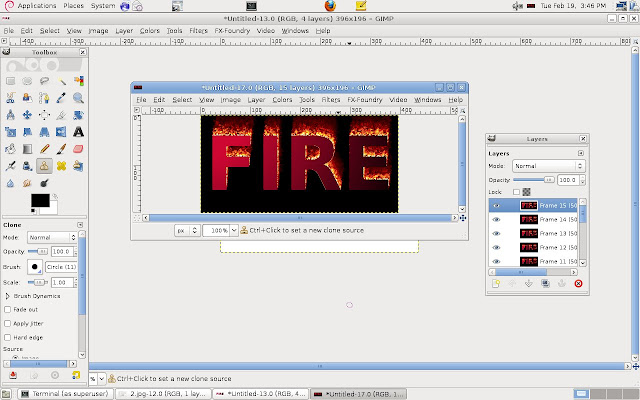
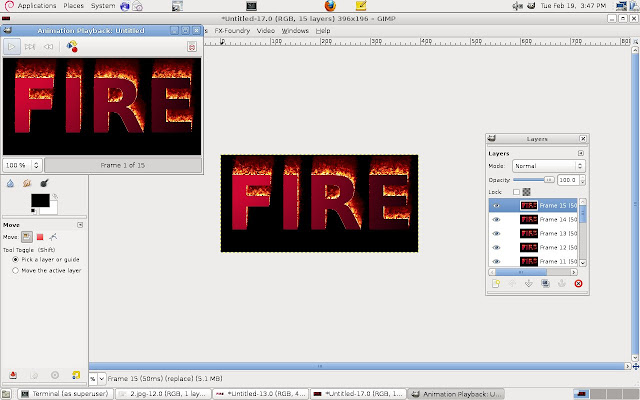
Now click OK and wait for gimp to do its magic. Once done, we should see a new window as below.


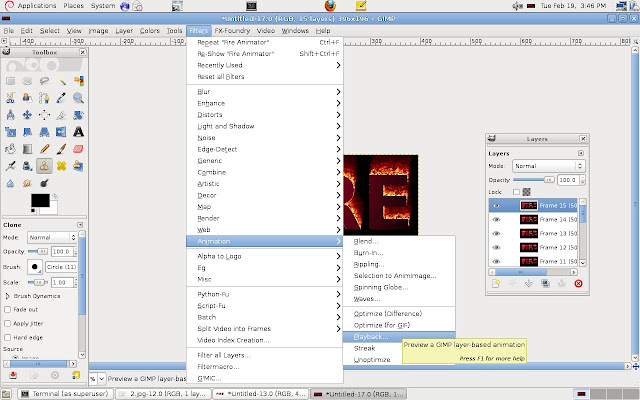
To see the animaton in a preview click on


Click on the play icon to see the animation.


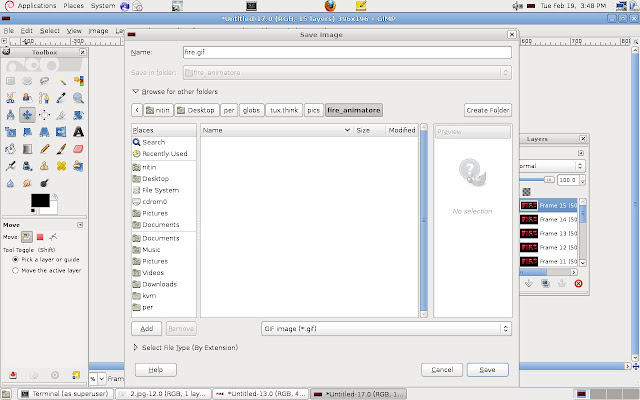
If it is satisfactory then close the preview and save the animation by clicking


Enter a file name with .gif as extension and from the file type options at the right bottom choose .gif and click on save.


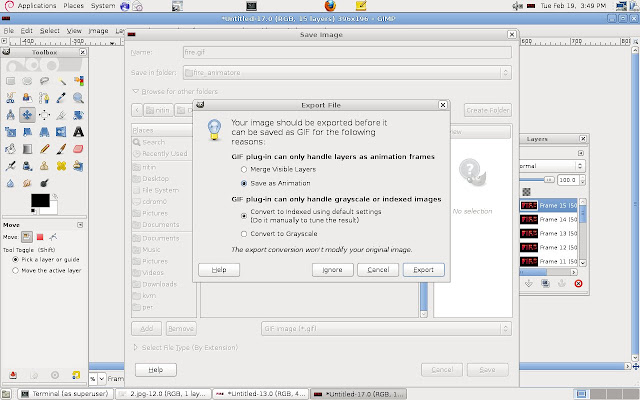
A prompt will be shown confirming whether we need to save the file as animation or single image, select save as animation and click on "Export"


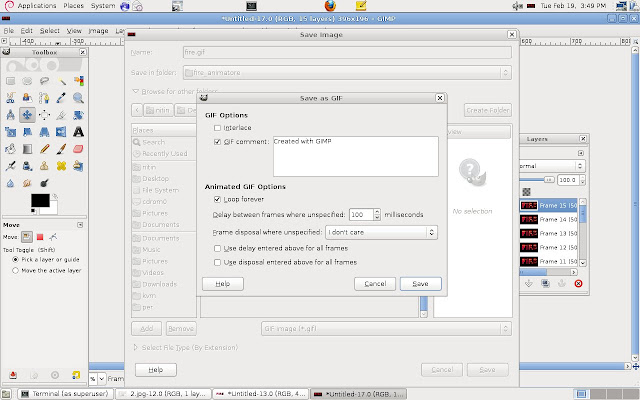
In the next window we can choose whether the animation should run once or continously by checking the loop forever box.We can also specify the delay between frames in case it is not mentioned in the layer attributes.


Now click on save. The fire animated image should be ready to use.


using read write lock in pthreads

When sharing resources between multiple threads, it is safe to allow multiple readers to access the resource simultaneous as they would not alter any data but only one writer should be allowed to access the resource at any given time.

The standard mutex, pthread_mutex_t, allows only one process to access the resource irrespective of whether the process is a reader or writer. The behavior even though safe, is not efficient, as the readers are made to wait even though they are not going to modify the data.

To allow multiple readers to access a resource at the same time we can use pthread_rwlock_t in pthreads. The pthread_rwlock_t which is a read,write lock allows multiple readers to access the resource, but allows only one reader at any given time.

The initialization function for this s


Thus we can use the initialization function as


Once the lock is initialized we can lock a resource for writing using the function


Once the write lock is held no other process can access the resource until it is unlocked using


To lock the resource only for reading and not writing we can use the function


Once the lock is held for reading, any number of other processes can access the resource of reading by locking the resource simultaneously. But the lock can not be held for writing, if it is already being held for reading. The lock can be unlocked using


To depict the working of rwlock let us look at the following example in which we create 4 threads, two for writing write_1,write_2, and two for reading,read_1,read_2.

We try to lock the rwlock in the following order


According to the above order we should not be able to get lock in write_1 and write_2 simultaneously but we should be able to get the lock simultaneously for read_1 and read_2.


Save the above code as rw_lock.c

Compile it using the -lpthread flag


From the output we can see that the two writes were executed one after the other. But in case of reads, even though read_1 had not unlocked the rwlock, read_2 was allowed into the critical section and read the file. Thus indicating that multiple readers are allowed but only one writer is allowed into the critical section.

kbleds.c for linux kernel version 3.7.5

The example of blinking led given at "http://www.tldp.org/LDP/lkmpg/2.6/html/lkmpg.html#AEN1201 " works fine for kernel versions before 2.6.36, but for version above that it fails to compile due the changes in the structure vc_data and ioctl call of tty_driver.

Here is the modified code tested and working on 3.7.5.

The changes are

1. change the the vc_tty pointer to port.tty


2. Remove the argument "NULL" being passed to the ioctl call of tty driver.


Full code:


Now save the file as kbleds.c

Compile it using the makefile


Insert it into the kernel using insmod


The key board leds should start to blink as soon as the module is inserted and will continue to blink as long as we do not remove the module using rmmmod


or reboot the system.

Creating letter drop effect using gimp in linux

Here is how we can create the animated effect of letters dropping on to a page, as shown below, using gimp.


Note:This was done using gimp2.6

First to be able to create the effect we need to install the additional gimp package called gimp-gap i.e. in ubuntu based systems run the command


After the installation is done launch gimp and go to


We will see a prompt as shown below.


In the text field enter the text for which the animation has to be created.
The foreground color is the color of the text and the background color is the of the background of the text, we can choose the color we want by clicking on each of them and selecting from the range of colors .


Letter delay field is to specify the delay between the letters appearing in the animation
Word delay is the delay between words in case there are multiple words in the text
Starting size is the size of the font with which the animation will start, the size will slowly decrease with each fram giving the dropping effect
The ending size is the final size of the text.
Frames per letter is the number of frames that you want to use for every letter in the animation. The more the number of frames the more detailed the animation will look.
Click on Ok and wait for gimp to do the magic. Once it is done we should see the following screen.


To check if the animation suits your requirements you can see the preview by going to


The following window will pop up, click the play button on the top left to see the animation.


If satisfied with the result, close the preview window and Click on


Enter the name for the file and add the extension .gif at the end.
In the file types option at the bottom right chose gif.


The prompt will be shown asking for confirmation whether the image should be stored as animation or as a flat image, choose save as animation


If the image size is big,a prompt for cropping the image might appear, choose crop and see if it affects your image or not.


The final prompt will allow to choose whether the animation should loop for ever or not.

The delay between frames can be specified in this has been specified next to layers itself, thus you can leave the default value of delay between frames as it does not affect the animation.


Click on save and the letter drop animation should be ready for use.